Only You Can Help

8 Feb

I just wanted to share with you guys… I have two doggies that mean the world to me! I love them as if they were my own children, and know they have feelings just as humans do. I stumbled upon this today and will try to do my best to change our lifestyle to help these poor animals out.


I know that I myself, alone, may not be able to do much, but I can spread the word to 100 people, and if those 100 spread the word to 100 more people, and so on, people can get the word out. With the internet we have today we can easily spread the word in 5 minutes. Facebook, twitter, your own blog are tools you can use to spread the word!


Just copy and paste this into a note on facebook, or your own blog!!


Here it is:


Many manufacturers of personal care and household items still test their products on animals, despite the growing number of alternative methods for evaluating product safety. The following list contains all such companies known and their associated brand names. In addition, it is updated as new information is made available to us. We cannot fully guarantee its accuracy, so please use the list accordingly–and do let us know if you can offer any further updates. You may wish to print out the list and take it along next time you go shopping! Please also note that all over-the-counter medicines and/or their ingredients are extensively tested on animals, as currently required by the FDA.


http://www.thevegetariansite.com/ethics_test.htm

  • Alcon Labs
  • Allergan, Inc.
  • Answer
  • Arm & Hammer
  • ArmorAll
  • Arrid
  • Axe
  • Aziza

_____________________________

  • Bain de Soleil
  • Ban Roll-on
  • Banana Boat
  • Bausch & Lomb
  • Benckiser
  • BenGay
  • Biotherm
  • Block Drug Co. Inc.
  • Bounty
  • Boyle-Midway
  • Bristol-Myers Squibb Co.

_____________________________

  • Cacherel
  • Cargill
  • Carpet Fresh
  • Carter-Wallace
  • Chesebrough-Ponds
  • Church & Dwight
  • Clarion
  • Clairol
  • Clear Choice
  • Clorox
  • Commerce Drug Co.
  • Consumer Value Stores
  • Coppertone
  • Coty
  • Cover Girl
  • Crest

_____________________________

  • Dana Perfumes
  • Dawn
  • Del Laboratories
  • Desitin
  • Dial Corporation
  • Diversey
  • Dove
  • Dow Brands
  • Drackett Products Co.
  • Drano

_____________________________

  • EcoLab
  • Eli Lilly & Co.
  • El Sanofi Inc.
  • Elizabeth Arden
  • Erno Laszlo

_____________________________

  • Faberge
  • Fantastik
  • Fendi
  • Final Net
  • Finesse
  • First Response
  • Flame Glow

_____________________________

  • Garnier
  • Giorgio Armani
  • Givaudan-Roure
  • Glade
  • Glass Plus

_____________________________

  • Helena Rubinstein
  • Helene Curtis Industries
  • Herbal Essences
  • Huggies

_____________________________

  • ISO
  • Ivory

_____________________________

  • Jhirmack
  • Johnson & Johnson
  • Johnson Products Co.
  • Jovan

_____________________________

  • Kaboom
  • Keri
  • Kimberly-Clark Corp
  • Kiwi Brands
  • Kleenex

_____________________________

  • Lady’s Choice
  • Lancaster
  • Lancome
  • Lava
  • Lever Brothers
  • Lipton
  • Listerine
  • L’Oreal USA
  • Lubriderm
  • Lux
  • Lysol

_____________________________

  • Mars (candy company)
  • Matrix Essentials
  • Max Factor
  • Maybelline
  • Mead
  • Mop & Glo
  • Nair
  • Naturelle
  • Neutrogena
  • Neutron Industries, Inc.

_____________________________

  • Olean
  • Orange Glo
  • Oscar de la Renta
  • OxiClean

_____________________________

  • Pantene
  • Parfums International
  • Pearl Drops
  • Pennex
  • Pfizer, Inc.
  • Pine-Sol
  • Plax
  • Playtex Corporation
  • Pledge
  • Polident
  • Ponds
  • Post-It
  • Prestige Brands
  • Prince Matchabelli
  • Proctor & Gamble Co

_____________________________

  • Quintessence

_____________________________

  • Raid
  • Ralph Lauren Fragrances
  • Reckitt Benckiser
  • Redken
  • Resolve
  • Richardson-Vicks

_____________________________

  • Sally Beauty Supply
  • Sally Hansen
  • Sanofi
  • SC Johnson & Son
  • Schering-Plough
  • Scotch
  • Scott Paper Co.
  • Scrub Free
  • Sensodyne
  • Signal
  • SmithKline Beecham
  • Snobal
  • SoftSheen
  • S.O.S.
  • Stanhome Inc.
  • Sterling Drug
  • Suave
  • Sun Star
  • Sunsilk

_____________________________

  • TCB Naturals
  • Tegrin
  • 3M
  • Tide
  • Tilex
  • Trojan
  • Truvia

_____________________________

  • Unilever

_____________________________

  • Vaseline
  • Vichy
  • Vidal Sassoon
  • Visine
  • Vivid

_____________________________

  • Warner-Lambert
  • Westwood Pharmaceuticals
  • White Shoulders
  • Whitehall Laboratories
  • Windex
  • Woolite

DIY Laundry Soap

23 Jan

Laundry Soap … Something you use daily and hurts your wallet monthly…

Why not “hurt” your wallet once a year and have enough soap to last you that long too.

What You Need:

1   4lb 12oz box of Borax

1 4lb box of Arm & Hammer Baking Soda

1 box Arm & Hammer Super Washing Soda

3 Bars of Fels-naptha soap

Optional:
2 small containers of oxyclean / or the off brand

 ALL OF THESE ITEMS WERE FOUND IN MY WALMART’S DETERGENT ISLE.

The Oxyclean tubs I bought came with these scoops, which are perfect for scooping the laundry soap.

First, Grab a small trash can or bucket and put a trash can liner in.

Dump all your boxes/tubes into the trash bag.

Now it’s time for the most difficult part of them all (unless you have a food processor)

Grading the soap!

Take the bag out of the trash can, and shake /stir.

Once it’s shaken up, dump/pour into your jar.

I bought a 2 gallon jar from Walmart for $10.

I put my Cricut to good use and made the label.

And you are done!

This should be able to last you 9-12 months, unless you do A LOT of laundry…

This should be around $20!

Ice Prevention!

1 Dec

Does this really work?? I’ll let you know!

I saw this on pinterest, and since we have a carport, we decided we needed to try this.

We haven’t had any snow yet, so once we do, we can try this!

Materials:

Spray Bottle [$0.97 @ Walmart]
Water
Vinegar
Funnel
Measuring Cup


I also have pictured a measuring cheat sheet…
The site I saw said 3 parts vinegar to 1 part water… so I had to figure out exactly how much I needed!

 The spray bottle I had, was about the size of a water bottle [16 oz] so thats what I based my math on.

It came down to 1/2 cup water & 1 1/2 cup vinegar!

Attach the funnel to your bottle:

And add all your liquid!:)

Then when your done, take out the funnel, and add the lid/squirt top back on!

Spray your windows the night before, so when you wake up in the morning, you won’t need to scrap your windows! :)

If you have snow, try this, and let me know how it worked for you! :)

Its December 1st, and I’m wearing a tshirt & leggings outside… I live in MO.

So hopefully soon we’ll get our weather back on track!

TShirt Scarf NO SEW!

1 Dec

I saw this lovely scarf on pinterest!

This took me about 15 minutes to make I believe, so very simply, and a great craft for kids as well!

What you need is:
old “plain” tshirt
scissors

 “Plain” … meaning nothing on it, or something in the top left corner….
My tshirt had something in the left corner, and worked great….
I haven’t tried doing a “busy” tshirt yet, but I’m sure it will come out ok, its up to you!!

First, you need to lay your tshirt flat!

Next, you’ll want to cut, just under the armpit area, and cut at the bottom at the seam, don’t worry about being pretty.


You can scrap those two pieces, you won’t be using them.

Take the middle part, and cut it into strips.

Make sure your strips are about ONE INCH thick. Any thinner, they may rip in our next steps!


Again, don’t worry about being pretty!!:)

Next, take each strip and line/stack them up at the seams..

Now stretch….

You obviously do this with both hands,
but I didnt have anyone to help me take a picture of that, so I had to use my foot…

Using your hands is a lot easier!! :)

Stretch Stretch Stretch!

Don’t over stretch and rip them, but a good pull will work!

You’ll also know when you need more or not…..

When you pull the strips, it makes them roll, so that is why it doesn’t matter how neat your cutting was!

Next, you’ll want to stack your seams on top of each other, if you didn’t do that in the previous step….

I actually cut a strip too thin, and it snapped, but it turned out ok…

If you didn’t cut one thin enough because you followed my tutorial :) then take a strip & cut it at the seams.

Take the strip and wrap it around the scarfs seams, to cover them up!

I started at one side, and wrapped over top my wrapping strip, to secure that edge, and then pulled it tight, and kept wrapping.

At the end, I can’t really explain how I closed it off, but I just kinda wrapped the end under and around the last loop.

You will be able to finish it off!:)

Take your other strip, and do the same on the other side, to cover those seams!:)

This is how mine looks!:)

And you’re done!!!! :)

Wasn’t that easy!


Quit throwing away those old tshirts, and make a scarf!! :)

The bigger the shirt, the bigger the scarf!

Pallet Coffee Table

15 Nov

This isn’t the most attractive, or amazing looking coffee table, but for our first time attempting such, and only costing us $7, we are pretty ok with it! :)

Materials we used:

Pry Bar
Hammer
Nails
Power Drill
Drill Bits
Screws
Wood Glue
10″ compond miter saw

We went to two local lumber/hardware stores, and asked if they had any pallets that we could have.

They usually don’t have the most amazing pallets, but they are free.

We picked up 12 free pallets, and were able to find 2 alike, to work perfect for us!

The first step is to find your pallets, and see if you have two or three alike…
When I say alike- I mean same size, and structure.

When you find your two or three, set them aside & save them.

Take some of your extras and start prying off the boards, make sure they are good boards,

as in no cracks / knots / etc. These boards will be your legs! You will be nailing and screwing into them.

So if you have cracks, you don’t want to further crack it when you nail into the board.

My husband was in charge of all these steps, so I’m sure your husband will know what to do.

When you pull off your boards, set them aside.

Be sure to collect all the old nails, don’t want them to get in your tires!

Once you have enough pulled off, you can start cutting them.

I put 4 pieces on each leg. You can get 3 pieces out of each board.

My husband put his measuring skills to work, and figured out we needed our table to be 19″ tall,

I’m not sure how tall the legs ended up being, but again, your husband can do that!:)

Once you have the “legs” cut, you’ll need to glue them together.

My husband made a pretty design with the glue, and then put the next piece on top and applied pressure!

If you do 4 pieces per leg like I did, you will glue 3 times per leg. 12 times total.

You should not use the whole bottle, I believe mine wasn’t full and I think he had enough.

But it all depends on how much you feel you need to use!:)

Once they are all glued together. Add a nail to the “top” and the “bottom” of the legs… on one side.

I think our nails were just a little long, and were slightly poking through the other side.

Set the legs aside.

Those two or three pallets you set aside, that will be your table,
take the one you want to be on top, and pry the bottom boards off.

Once you have the boards off, make sure the nails are out of the structure boards,
and smooth the structure boards …

This is the sand paper we bought, and it worked very well.

Start sanding EVERY inch of these boards! They were rough before we started, now they are semi smooth

and when we bump into the table, we aren’t stabbed with tons of splinters!

______________________________________________

While you still have the top pallet upside down, put the bottom pallet upside down on top of it.

Next start screwing the top boards together.

Your husband will know more about this than I even do! :)

My husband started screwing the table together in a diagonal angle, and he just put a screw in where he saw necessary.

You can see in my above picture how the pallets are set up.

The green bars show what will be the bottom pallet, and the pink is the top.

When you have your boards are screwed together you can now attach the legs.

You can see above where we positioned our legs.

It doesn’t matter which end you attach to the table, again a job for the husband.

We tried to put the “prettier” side at the top, so it would be seen more, as to its closer to carpet.

Also though, you have to worry about the cracks, and cracking so you’ll just have to see what you have and make the best decision!

Here you’ll want to do the drill bit, and then the screw.

We did two screws per leg.

And your table is complete! :)

You can see by the black and pink lines which pallet is which.
By taking off the bottom boards of the top pallet, it gives it a more together/one piece look.

Organization Part3

12 Nov

Ok, here we go.

I posted about writing lists & figuring out what you can organize together & how.

Our next post, was about it all coming together and using jars for items.

This post will be how I cleaned the jars, and other storage solutions you can use.

You honestly have to think outside the box when it comes to storage, I have been picking up different pieces,

and just saying “OH, I can use that for this…” and slowly it’s coming together.

Here is how I cleaned my baby food jars…

I used:

I know, I know. Why did I use so much?!

Cause I’m crazy!!! :)

I used the “Goof Off” for the sticky labels…. which has a STRONG smell, so be sure to walk away or have a window open.

I used the 409 to get the germs away, I got them from a woman I met on FaceBook, & knew she saved them in her garage.

I used the Spic & Span for the shine!:) & I didn’t want him to feel left out!:)

But after you get the label off, you could use soap & water!

Here is my jars before, labels & all.

Soaking is key!:)

With warm water running, squeeze in Goof Off [I probably did 4 squeeze’s for 30 jars]

I squirted probably 5 of 409 & Spic&Span.

Once the water is getting high enough for all the jars, start dropping them in.

[[ Be sure water goes INSIDE the jar, so its fully soaked, and doesn’t just float on top of the water ]]

I also threw in the lids, I didn’t last time I cleaned them.

Its totally up to you.

When they have soaked for about 30 minutes, start scrubbing.

Take an OLD rag, and scrub at the sticky off, some came off easier than others!

Then let them dry.

Start filling!:)

** There is a baby food jar organizer in the baby aisle… I will soon be getting a few and make a shelf that is wide enough
to hold the organizer…. Will help with taking up space!! **

_______________________________________________________________________________

Other ways to organize and store:

I used a long skiny white basket and some hooks, and made a tray to store my paint brushes!

At big stores, these hooks come in a connected set of 6, but if you look at smaller independent stores,

you can find the single hooks… Which not only work for your screwdrivers, but for

your scissors & xacto knife!

Also something you can find is the travel size wipe container.

I used 4 of them to hold my scrapbooking stickers.

I used clear mailing labels to write on and label each container.

I did “scrapbooking stickers”, “holiday stickers”, “ABC 123 Stickers” & “Misc Stickers”

Awesome enough, the 4 containers, fit great into a long skinny basket.

Also reused a wooden shelf.

Just added some silver spray paint to liven it up, and it was a whole new shelf!:)

As you can see.. I still have a lot more to organize!!! :(

Organization Part2!

16 Oct

Ok here we go:

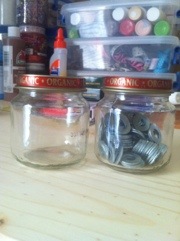
So far what I’ve found baby food jars (used/empty) and cleaned them all up to look like this:

20111016-160550.jpg

I have a clean empty jar, and next to it, you can see I have one that I’ve already put one type of washers in. I probably have 9 full now, needing more… So hook up with someone who has a baby, and see if you can steal their jars when they’re done.

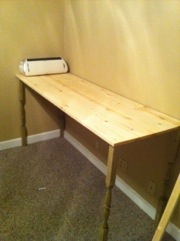
As you can see also in the photo, I already have my table in their. My husband built it for me, it’s nothing fancy… But it was super cheap, and if I spill paint or glue or lots of glitter, I won’t be too upset because it didn’t cost me $200!!

20111016-160845.jpg

I believe it is a 6ft table… Only cost me $40 to make it.

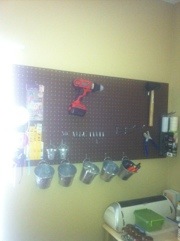
We also bought a peg board! The board was $6 (they had double the size for $10!) and the board to attach it to the wall was $3! I also purchased hooks at Lowe’s, but I’m sure you can get them at Walmart.

20111016-161142.jpg

Here is just a quick show of how I’m doing it so far. I’ll give a better presentation later, once it’s finished!

20111016-161210.jpg

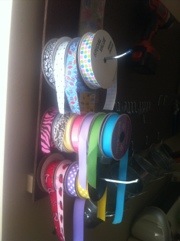
I used a long single hook for ribbon- you could also make a holder with a dowel rod.

20111016-161402.jpg

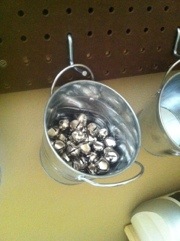
Using pails I already had for varies things- pens, markers & jingle bells!

20111016-161500.jpg

20111016-161525.jpg

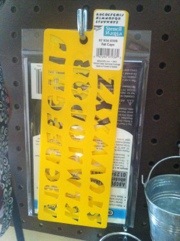
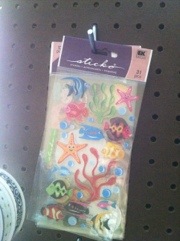
Feels like we’re in a store- but it’s a quick easy way to store those stickers And stencils!:)

Crayon Canvas!

13 Oct

I know many of you have probably seen this…

and it is very easy to make!

It was a night project for me. The longest part is the melting…

What you need:

Crayons
Canvas
Super Glue / Hot Glue
Hair Dryer
Trash Bags / Newspaper

I did this project inside, that is why I suggest trash bags or newspaper.

I used 2 boxes of crayons.

I did not use the color: White, Brown, Black or Gray.

You can use any color combination you want. You can put them in any order you wish.

First step would be to “line up” your crayons.

I did them in order of light to dark, from one color to another.

This is a perfect task for little hands!

Put them next to your canvas, so you know they will fit.

The next step, is to adhere them to the canvas.

I used super glue, because I do not own a hot glue gun yet…

It works great.

I actually glued the canvas, then stuck the crayons on.

I wanted “Crayola” to be sticking up, and gluing the canvas was the best option for that.

I just swirled the glue around, and then stuck on my crayons. Once you have one crayon on,

you could just put the glue on in strips, because you know how long the crayon is.

When you have them all glued on, it will look like this:

I honestly have no idea why I have a gap at the end, next to green.

My blue is on fine, so one of my crayons must have issues… but oh well! :)

When it comes to the “melting” process, you can start out how you wish.

I started using a lighter because I figured it would get the crayon going a bit quicker.

It worked out great, but it also got my crayon wrapper as well.

So I quickly switched over to the hair dryer….

You will need to use trash bags or newspaper if you are inside for this, because with the hair dryer,

you have that big gust of air, which means splatters… So I leaned my canvas against my couch,

with little trash bag wings on the side, and trash bag behind and below it.

So when it did splatter, it got on the trash bag, not the carpet.

I  put my hair dryer on LOW  because I didnt want too much air.

And I also did a mixture of leaning down toward the crayon, [as you see] and also straight on.

You will notice at some times that the crayon wants to RUN… so I used the cold setting on the dryer, to freeze it.

And here is my finished product:

I think the size is perfect, because it is currently in my bathroom.

However, I will do a much bigger one, when it comes time to decorate a child’s room, or a play room.

Organization Part1!

11 Oct

Organizing your craft area!

Is hard!:)

If begun to “organize” my craft area, so I can find things easier, and just be able to craft in a easy, relaxing manner. I’ve never had a craft table, or any sort. Unless the kitchen table counts.

My husband has agreed to build me one! (it’s the simplest table ever!) I am forced now to organize all my crafts, so I can organize my table!

I’ve watched many many YouTube videos about “My craft room tour”, “Organizing your craft table!” and “How to organize your scrapbooking accessories”…. But no video ever showed me How To Get Organized! Seems simple enough to organize everything you have, but once you have all your ribbon together, all your markers together, what are you suppose to do with them?

Hopefully with this series of blog post, I can help you get organized too!

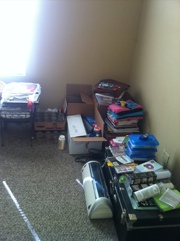
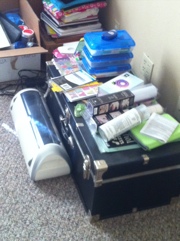
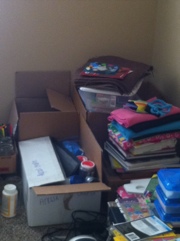
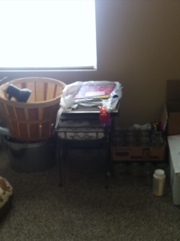
Here is my “Craft Area” now….

20111011-114531.jpg

And up close:

20111011-114600.jpg

20111011-114605.jpg

20111011-114610.jpg

And the last up close picture I believe is more my photography props than my craft stuff!:)

But here is what I did:

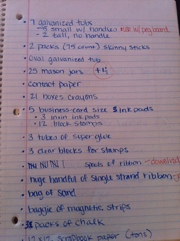
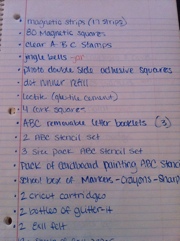
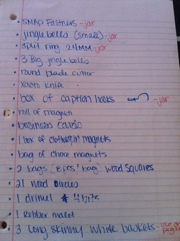
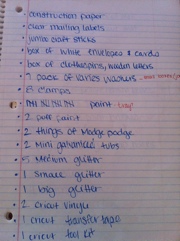
First things first, I got a notebook and I wrote down EVERY SINGLE THING I HAVE!

20111011-114734.jpg

20111011-114740.jpg

20111011-114750.jpg

20111011-114745.jpg

Then I went back through with a different color and marked how I might store that item. Rather it be basket or jar (mainly jar) I was able to see what exactly I have, to better figure out what exactly I need!

I still have a few more craft boxes to go through, and I won’t be getting my table till Friday (today is Tuesday!)… So get started organizing, and I’ll have more hopefully soon!!!:)

Covering a Cork Board

7 Oct

This tutorial, is pretty easy to do!  This tutorial leads us into the next!:)

What you need is:

Cork Board
Fabric
Staple Gun
Hammer
Hanging Hook/nails

First things first, you need to measure your board, and make sure you have enough

fabric to go all around your board.

I didnt even buy a full yard, I think I may have had 3/4 a yard & I could have probably covered 2 boards.

Your first step is to lay your cork board, cork side down onto the back side of your fabric.

Like the picture above.

Then you need to take one side [I take one of the long ones] and pull the fabric over the board,

kinda tight, and then staple down the fabric.

Be sure to pull tight on every staple, so your fabric isn’t loose when you are done.

Then once you have finished one side, you need to do the opposite side.

Pulling tight on this step is easy. You don’t have to worry about pulling TOO MUCH fabric,

you just pull what is left, since the opposite is already stapled.

The next step, is a bit difficult to fully explain in just words.

I’ve made a “collage” that shows a step by step pictures of how to pull the fabric around the corners.

You can do this step differently if you have a better idea, but this is how I do it.

After doing this step, you just finish pulling the short sides in and stapling.

Then you are done. You can take extra fabric and cover the back, but I didn’t.

You will also need to attach a picture hanging hook so you can hang it on a wall.

Look for the next tutorial, to see what else you can do with this technique!